Organizations use different digital platforms to efficiently carry out their day-to-day operations. HubSpot is one such popular platform for managing sales, inbound marketing, and customer service. However, you need to centralize the data generated through HubSpot for improved data accessibility, collaboration, and analysis.
For centralization, you can use Amazon Redshift, a widely-used cloud data warehouse. Moving HubSpot data to Redshift will enable you to leverage the scalability and advanced analytics capabilities of Redshift. This will help unlock the full potential of your customer data for actionable insights.
In this guide, we’ll explore the best methods to move your data from HubSpot to Redshift. But, first, let’s look at an overview of both platforms.
What is HubSpot?
HubSpot is a cloud-based customer relationship management (CRM) platform that offers software products for customer service, inbound marketing, and sales. HubSpot CRM provides a centralized database where you can manage your contacts, tasks, and companies. Some of the useful features it offers include lead management and tracking, document tracking, ticketing, sales automation, data sync, and landing page builder, among others.
What is Redshift?
Amazon Redshift is a fully-managed, petabyte-scale data warehouse service provided by Amazon Web Services (AWS).
The configuration of Redshift involves two types of nodes—single node and multi-node. A single node can store up to 160 GB of data. On the other hand, a multi-node contains more than one node and is of two types—Leader node and Compute node. While a leader node manages client connections and receives queries, a compute node executes the queries, sending intermediate results back to the leader node.
In Redshift, the collection of such nodes is organized into a group called a cluster.
Redshift uses a columnar storage format, where data is stored in columns rather than rows. This allows faster data retrieval and improved query performance. For querying, Redshift supports standard SQL to analyze structured and semi-structured data across data lakes, operational databases, and data warehouses.
Why Move Data From HubSpot to Redshift?
Redshift has the capability to handle large volumes of data and complex queries efficiently. The columnar storage and parallel processing allow for fast query execution on massive datasets. By streaming data into Redshift, you can get real-time insights in seconds and make timely, data-driven decisions.
Methods to Move Data From HubSpot to Redshift
Moving data from HubSpot to Redshift can be done using one of the following methods:
- Method #1: Using HubSpot API and Redshift COPY command
- Method #2: Using SaaS alternatives like Estuary
Here’s more detailed information about the two different methods.
Method #1: Using HubSpot API and Redshift COPY command to Move Data From HubSpot to Amazon Redshift
HubSpot API is a collection of a robust set of APIs that follow the REST architecture and can be accessed through HTTP. All HubSpot API calls require a parameter specifying an OAuth Access Token or private app access token. HubSpot encourages using basic authentication with private app access tokens for testing and rapid prototyping process, while OAuth is recommended for critical integrations.
To efficiently extract and move data from HubSpot, follow these steps:
Step 1: You can use APIs to extract HubSpot data by using tools like Postman, CURL, or HTTP clients. The responses of HubSpot’s APIs are in JSON format.
Step 2: After extracting data from HubSpot, load it into an Amazon S3 bucket. Start by creating an S3 bucket using the S3 console, AWS SDKs, or AWS CLI. Then, send your data to the S3 bucket by using the AWS REST API.
Step 3: To load data into Amazon Redshift, use the COPY command. It copies data that are stored as flat files on S3.
Step 4: Upon executing the COPY command, Redshift reads multiple files simultaneously and automatically distributes the workload to Redshift cluster nodes. Check out the COPY examples on different ways you can invoke a COPY command.
This completes the process of moving your data from HubSpot to Redshift.
Limitations of Using HubSpot API and Redshift COPY Command to Move HubSpot Data to Redshift
While using the above-mentioned method can be efficient, there are a few limitations involved:
- HubSpot API has rate limits that help prevent an infrastructure overload. Based on your subscription level, there are restrictions on the number of API requests you can make within a specified timeframe (per 10 seconds and per day). This impacts the speed of extracting data from HubSpot, especially for the transfer of large volumes of data.
- Due to the limitations on processing time or payload size, using a single API call for a substantial amount of data in HubSpot isn’t feasible. For such scenarios, batch processing is more suitable.
- If you want real-time or near-real-time data synchronization between HubSpot and Redshift, this method falls short. Consider change data capture (CDC) or integration with HubSpot webhooks for capturing data updates and triggering the data transfer.
- The Redshift COPY command implicitly converts the data types of the source data to the data type of the target column. If not carefully mapped, this can lead to havoc with your data. When you want to specify a conversion that’s different from the default, you must explicitly specify it.
Method #2: Using SaaS Alternatives like Estuary to Move Data From HubSpot to Amazon Redshift
Estuary Flow is an efficient DataOps platform that enables real-time data integration between supported platforms. Built on Gazette, an open-source streaming broker, Flow offers seamless integration with a range of data sources and connectors.
It takes only a few minutes to set up a real-time data pipeline with Flow’s easy-to-use interface and a variety of pre-built connectors.
To move your data from HubSpot to Amazon Redshift in minutes using Estuary Flow, here are the steps to follow:
Prerequisite: Before you get started, set up Redshift to connect with Flow. To learn how you can do this, refer to the documentation.
Step 1: Log In
You need to log in to your Estuary account to get started. Don’t have one? Then register for a free account.
Step 2: Create a Capture
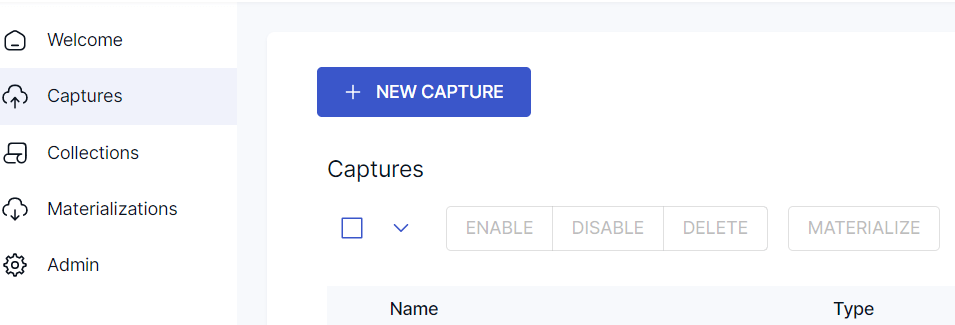
After logging in, the next step is to set up your data source—HubSpot. Click on Captures on the Estuary dashboard, then click on the NEW CAPTURE button.
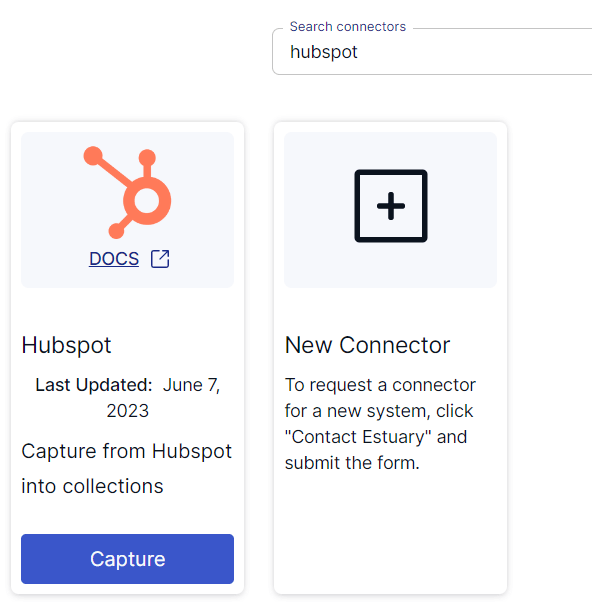
Search for HubSpot in the Search Connectors box. You’ll see the Hubspot connector in the search results. Click on the Capture button of the connector.
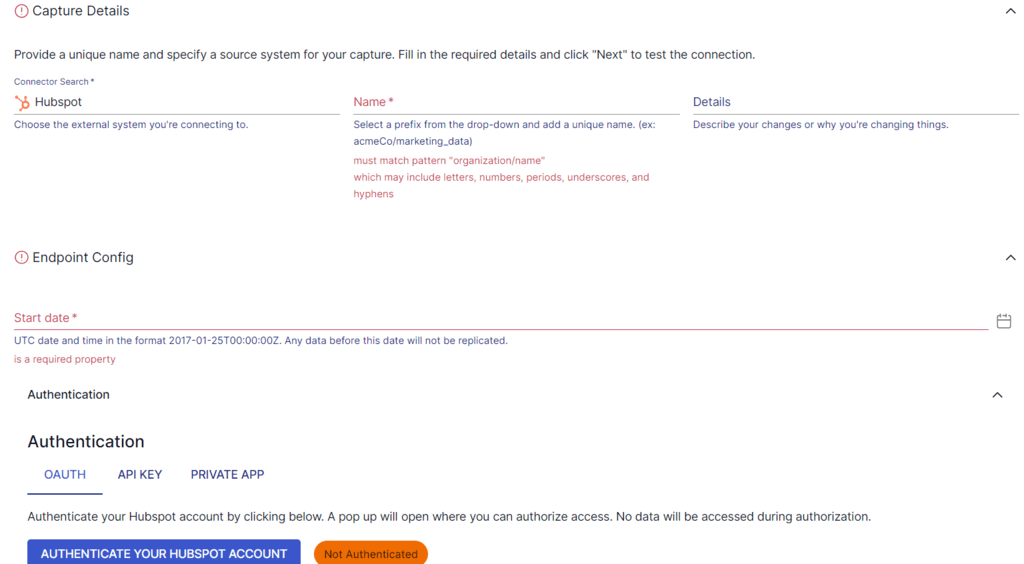
You’ll be redirected to the Hubspot connector page. By default, this connector maps each of your HubSpot account’s resources to a Flow collection through a separate binding.
Enter the required details like a Name for the connector and Start date. You must also authenticate your HubSpot account when capturing data. For authentication, you can use OAuth2 or use a private app access token for manual authentication. Ensure that you have a HubSpot account to use either authentication technique.
After you’ve entered the details, click on the Next button. Flow will connect to your HubSpot account and detect all the available data resources. Click on Save and Publish.
Step 3: Create a New Materialization
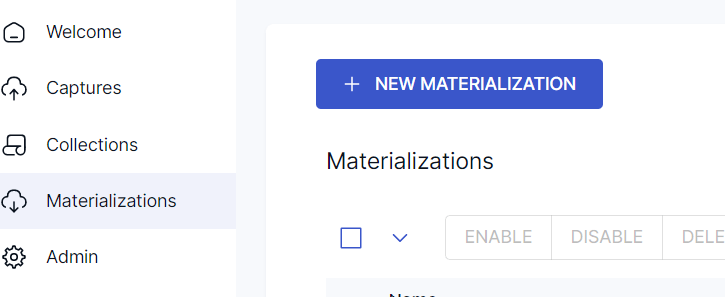
The next step is to set up the destination—Redshift. There are two ways you can set up the data’s destination. Either click on Materialize Connections in the pop-up that follows a successful capture or navigate to the Estuary dashboard and click on Materializations. Then, click on the NEW MATERIALIZATION button.
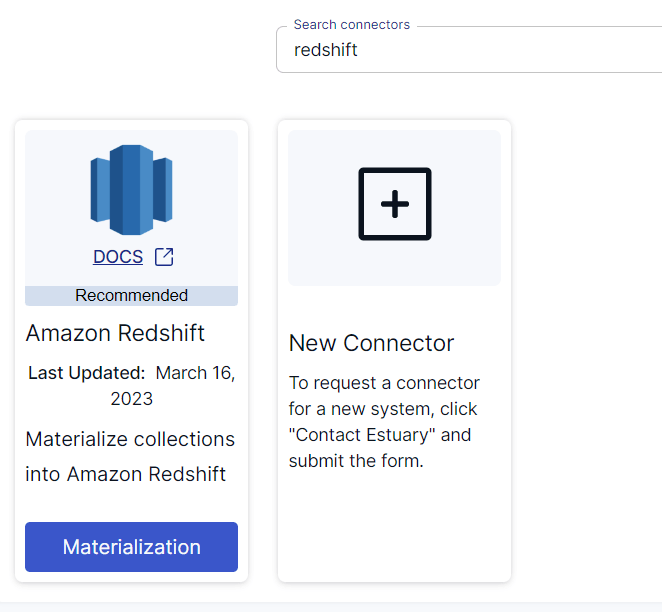
Search for Redshift in the Search Connectors box. The Amazon Redshift connector option will be displayed in the search results.
Click on the Materialization button to be redirected to the connector’s page. The Amazon Redshift connector materializes Flow collections into tables of an Amazon Redshift database.
By using your AWS account, this connector materializes data into Redshift tables, with a temporary staging of files in an S3 bucket.
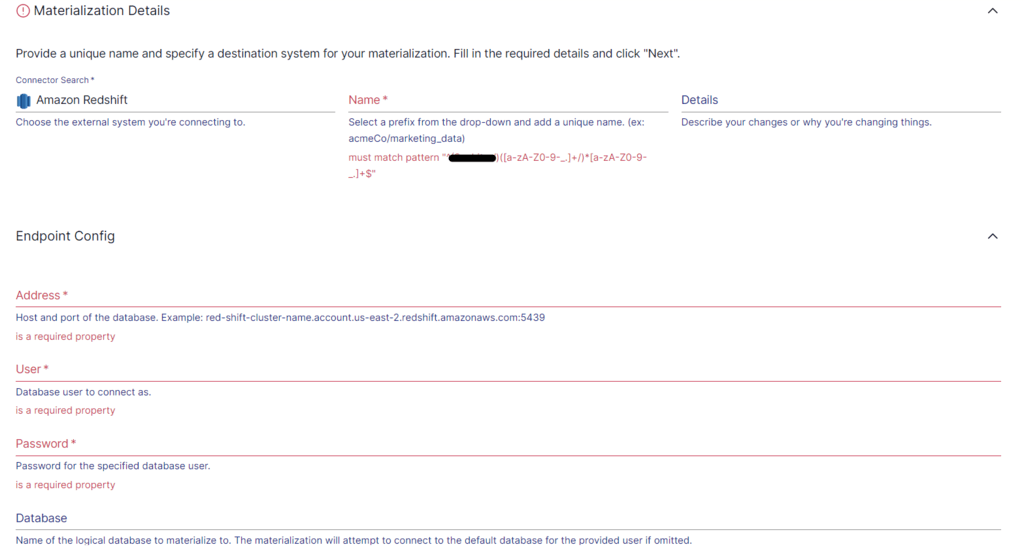
Fill in the required details like Address, Username, and Password, then click on the Next button. If the data captured from HubSpot wasn’t filled in automatically, use the Source Collections section to add the data. Then, click on Save and Publish.
This will successfully move your HubSpot data to Redshift tables.
If you’d like a more detailed set of instructions, read into the Estuary documentation on:
- Hubspot source connector
- Redshift materialization connector
- Detailed steps to create a Data Flow like this one
Conclusion
Effectively moving data from HubSpot to Amazon Redshift allows organizations to leverage the power of cloud data warehousing and advanced analytics. The two methods to move HubSpot data to Redshift are by using HubSpot API and Redshift COPY command and using SaaS alternatives like Estuary. However, if you’re looking for a low-code, real-time data integration solution, Estuary is the better choice between the two methods.
Estuary Flow makes real-time data migrations easy with a user-friendly, easy-to-use platform. It takes merely a few minutes to set up a real-time data pipeline between your choice of platforms. Why not experience the power of Flow today? Register for an account; your first pipeline is free!

Author
Popular Articles


